Last Updated on May 4, 2024 8:29 pm
If you have ever bought a used hard drive or pulled a hard drive from a NAS unit or other machine, it may have an incompatible file system installed on it, or just has a bunch of data you don’t care to have on it anymore.
From within Windows you can easily wipe all the partition information off the hard drive from the command prompt. But it is a good idea to double check the disk you’re about to wipe, because recovery can be difficult if not impossible if you wipe the incorrect disk. So be sure to use caution and triple check before doing this.
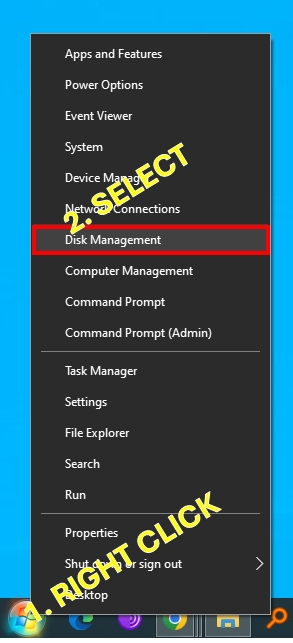
First I would open up Disk Management by right clicking the start menu and selecting disk management.
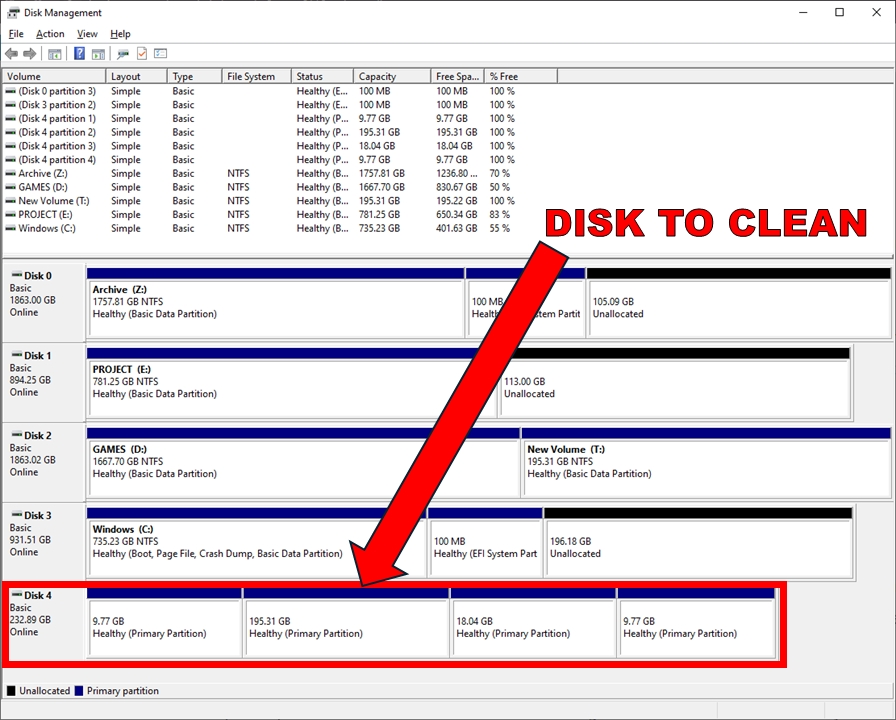
Depending on how the disk was formatted previously or what partitions are on it, it may give you some message that the partitions can’t be read, or will ask to initialize the disk. I would just select “NO”.
Now look for the disk in the list at the bottom. You can right click the disk number and select properties and in the dialogue box at the top should tell you the name of the hard drive or SSD. Make note of the Disk number associated with that disk.
Then open up an elevated command prompt (start menu, type ‘cmd’ right click ‘cmd.exe’ and select “run as administrator”). You can double check what the disk number is by typing:
wmic diskdrive get index,model,serialnumber,size
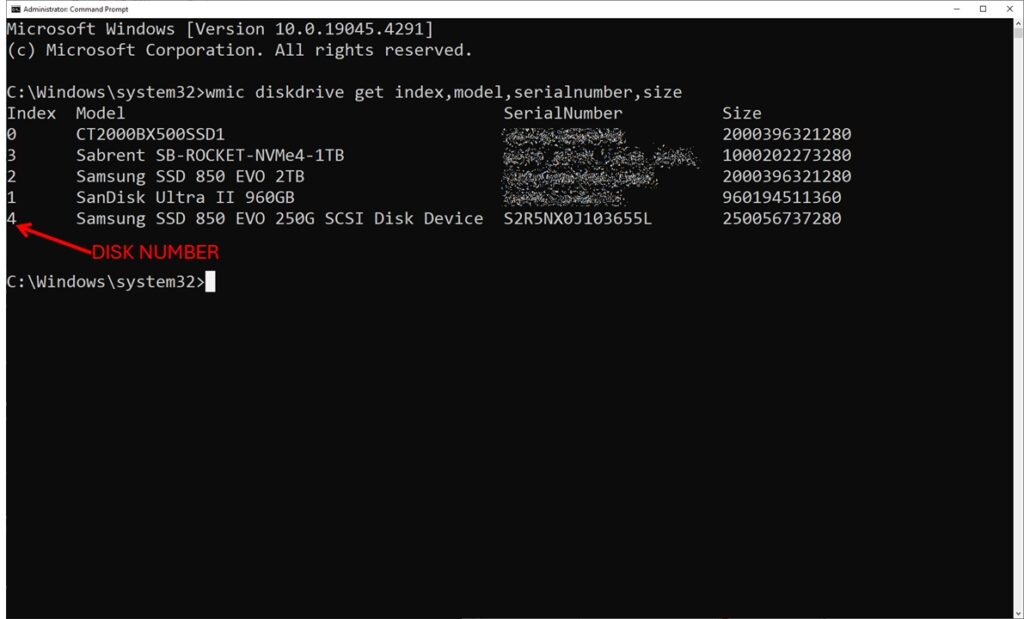
This should provide you with a list of the disks connected to your system including the index number which is equal to the disk number, which should be same as the one in Disk Management. The serial number and size are there to verify you have the correct disk in case you have multiple same or similar disks in your system.
Now to wipe the partition information. You will do this using a Windows command line utility called “DISKPART” by entering the following commands
DISKPART
LIST DISK
SELECT DISK (disk number)
CLEAN
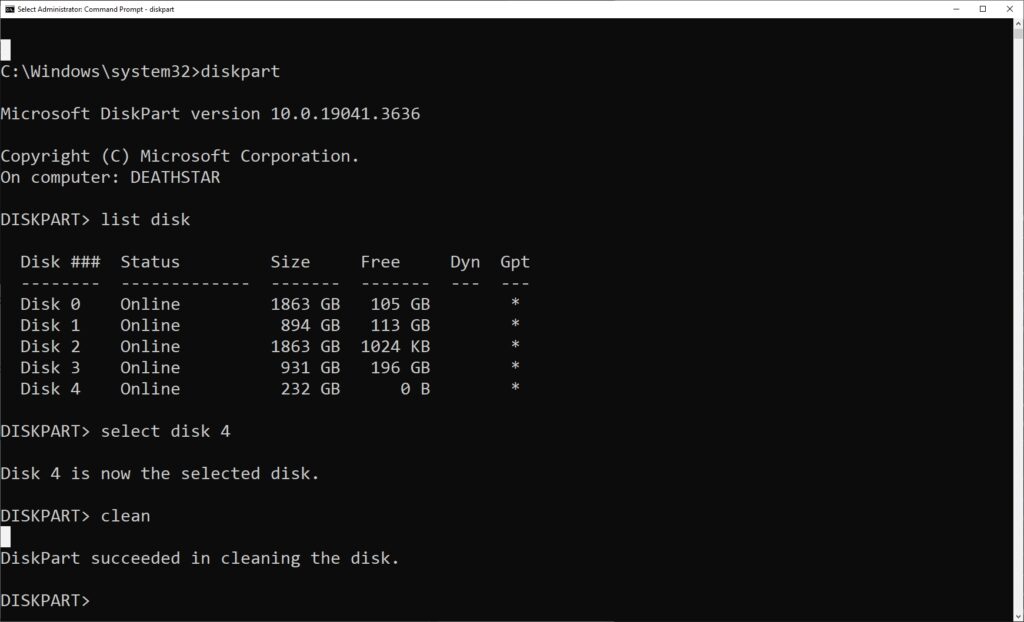
Once you issue the CLEAN command it will immediately wipe all partition information from the disk. So make sure you chose the proper disk.
Now your disk should be “blank” in Disk Management. You can right click the disk and select “initialize disk” and initialize it as a GPT disk. Then you can format it with an NTFS partition.
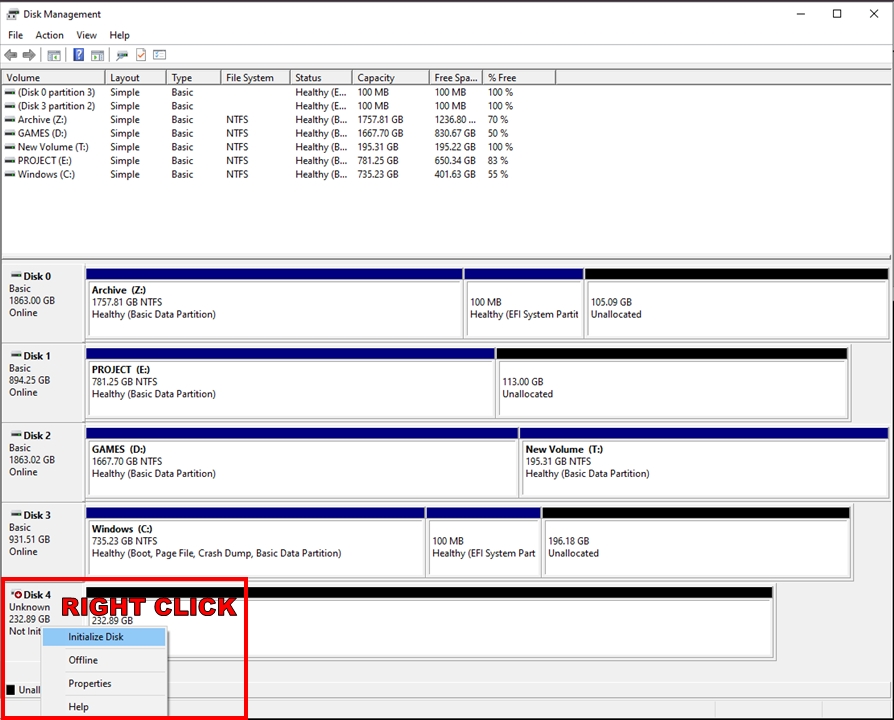
Now you should be good to go! Simple enough, right?
